Shannon's Studio - Shannon Christensen
  • Home
    • Welcome
  • Roadmap Stops
    • 1 LIFESTYLE Landmark >
      • My Fabric Collections
    • 2 LEARNING Landmark
    • 3 LIVING Landmark >
      • 8CPH Courses
      • JUMPSTART 8 CPH
      • #1 CPH IDEABOOK
      • #2 CPH THINK TANK
      • #3 CPH SKETCHBOOK
      • #5 CPH X•X•O
      • #6 CPH SUPERPOWERS
      • #7 CPH VISION
      • #8 CPH SHOW & SHARE
    • 4 LOVING IT Landmark >
      • Illustrated Lifebook
    • 5 LEADING Landmark >
      • Build Your Body of Work • Shortcut to Your Signature Style
  • PASSPORT
  • Shop
    • Shop • 1 Lifestyle & Space
    • Shop • 2 Learning & Skills
    • Shop • 3 Living & Habits
    • Shop • 4 Loving It & Identity
    • Shop • 5 Leading & Business
  • MORE
    • Portfolio
    • Blog - Creative Roadtrip
    • Benefits of Creativity
    • Thank you for your Purchase

Blog - The Creative Roadtrip

DIY Parade Float Design • 7 Quick Tips

7/5/2012

9 Comments

 
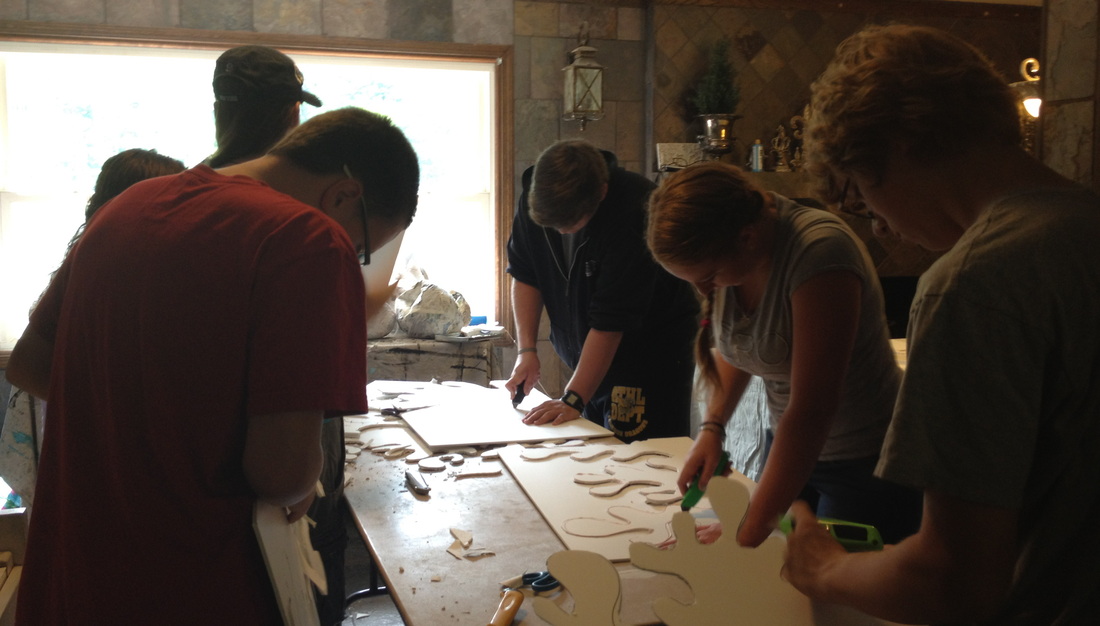
Independence day has been filled with parades for a very long time for me. The marching bands are what the Boyfriend likes best but my favs are the floats. I'm delighted and it's almost like being a kid again.
I had another chance to do a parade float this year. Part of me really enjoys it and another part doesn't. It's a great creative DIY outlet that's a lot of fun but the uncertainty of how to do it and if it will turn out is a challenge. Some people think it will come together automatically because you're a creative and that it's no big deal, whlie others think it isn't going to work out at all.  In the process, you'll swing back and forth like a pendulum.
Photo Parade float - Free to Be Fishers of Men - Shannon Christensen
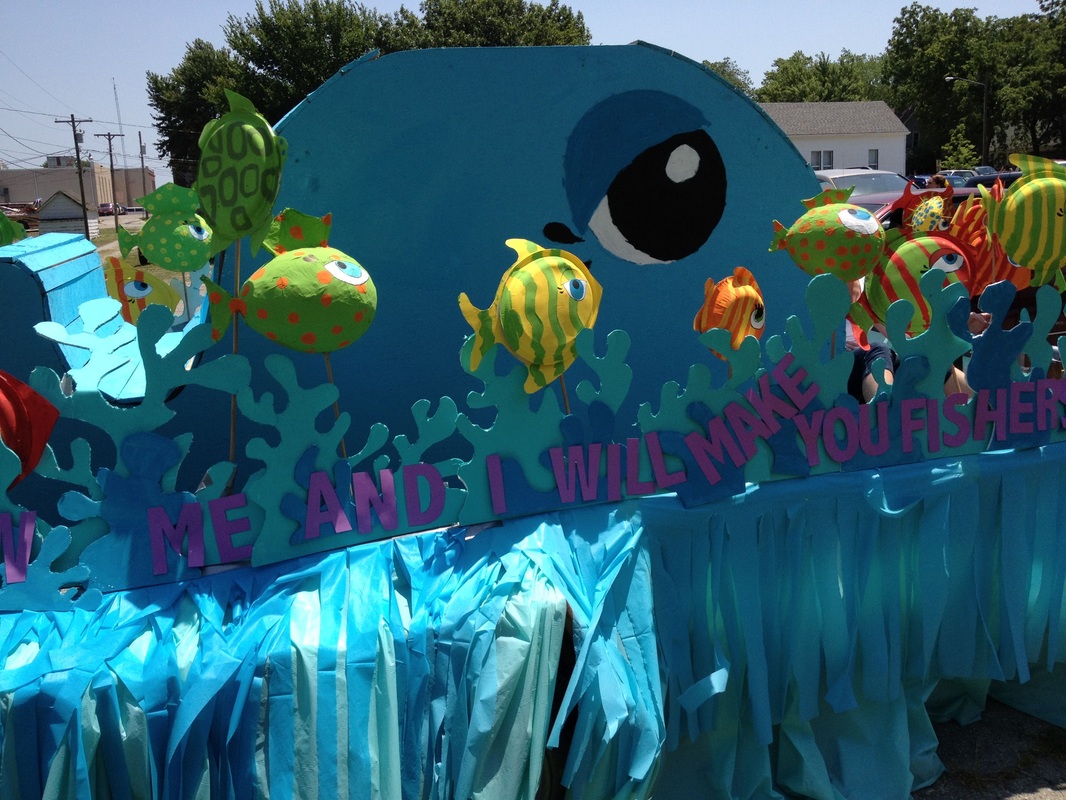
There's a lot of people web searching this time of year for DIY float building info. Last year's 5 Parade Float Quick Tips (found here) has been viewed and reused. So, I thought I'd share 7 ideas about parade float designing.
Photo Parade Float - Free to be Fishers of Men - Shannon Christensen
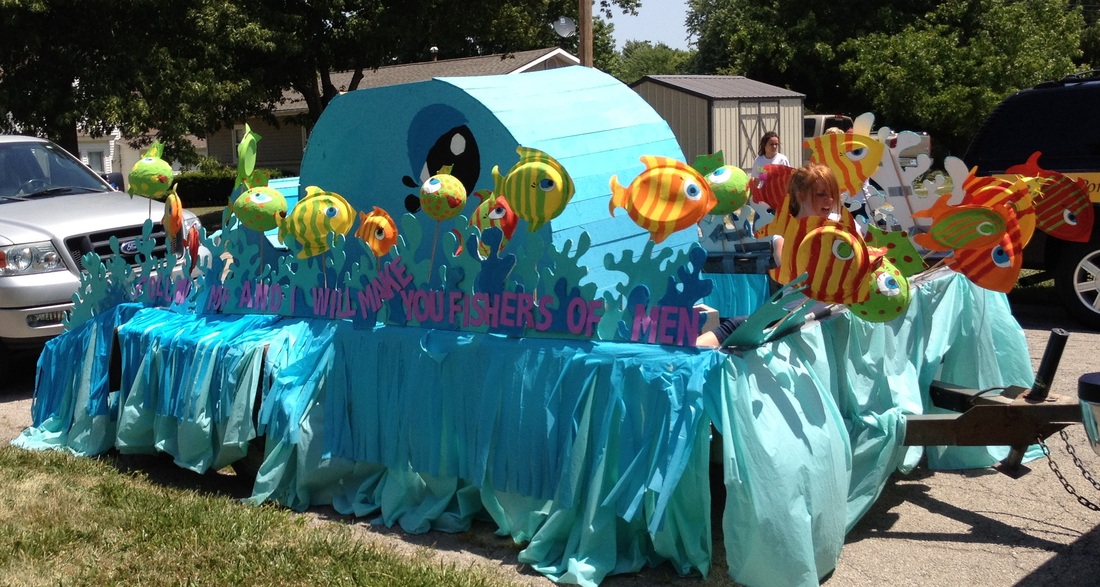
Still working on last minute taping things down

Parade Float Designing • 7 Quick Tips

Since the float this year had a fish theme I thought I'd play that up with the tips.

#1 Fish for the Big Picture

You're likely doing this for an organization of some type. Think of their purposes for wanting the float. What do they hope for an outcome? Are they interested in the process and having a lot of people involved? Or is it an outreach in the community? Or is it a tradition of fun? Or is it to show a strong brand? Whatever the reason, you should understand it. This float was about involving people in the process, name recognition in the community, and a Christian message.
People: We had about 40 people work on the float
Parade float work party • shannon christensen
Recognition: Passing out info cards & candy during the parade
Parade float pass along cards
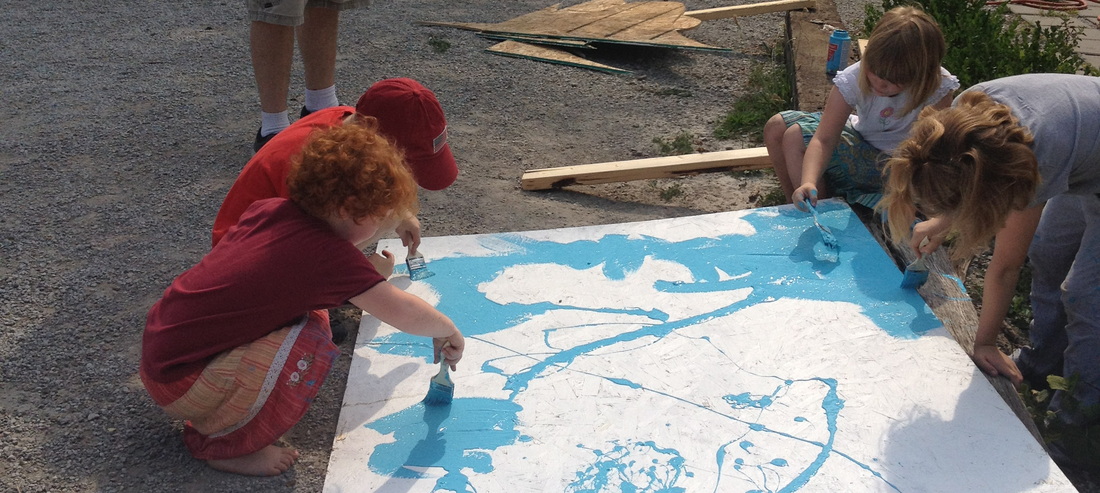
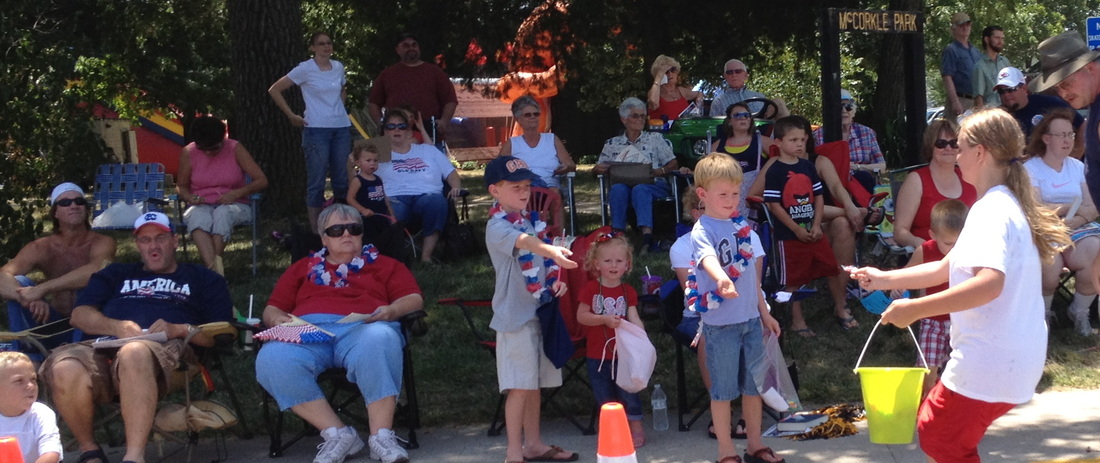
Message: Free to be Fishers of Men - Bible verse used as the message
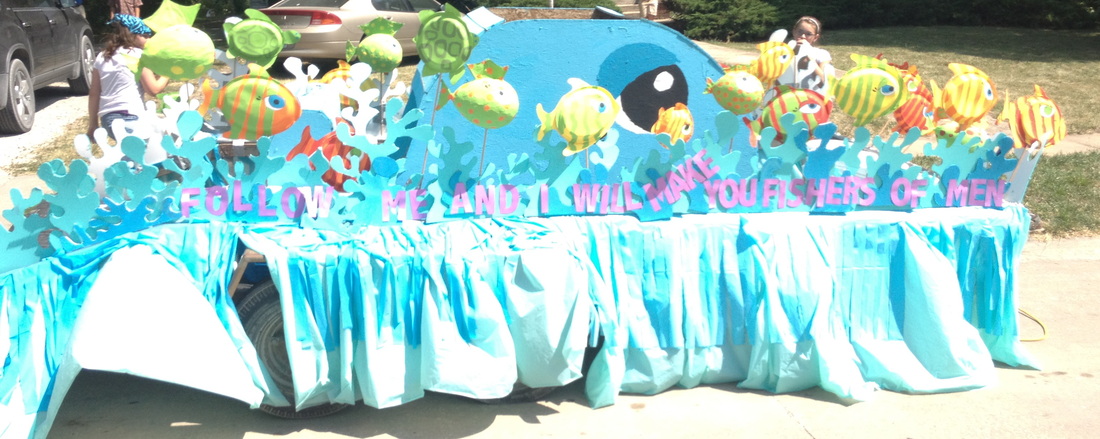
Parade float message • Shannon Christensen

#2 Fish for an Original Idea

It all comes down to having an idea. Sometimes that can be hard to do. One tip is to look for inspiration to borrow and then make it your own. Here are 2 inspiration images that I found.
Papier Mache Fish by Nassos Karabatsos via Behance on ShannonsStudio.com
Papier Mache Fish by Nassos Karabatsos via Behance
Picture
Sergio Bustamante 
Papier Mache Fish Sculpture
I liked the idea of dots and stripes. I thought that would be easy for our group of varying ages to do. I also borrowed the color scheme of the group of Nassos' fish. Here's how our fish turned out. We made them out of paper plates, poster board, & paper mache.
Photo Parade float fish • Shannon Christensen
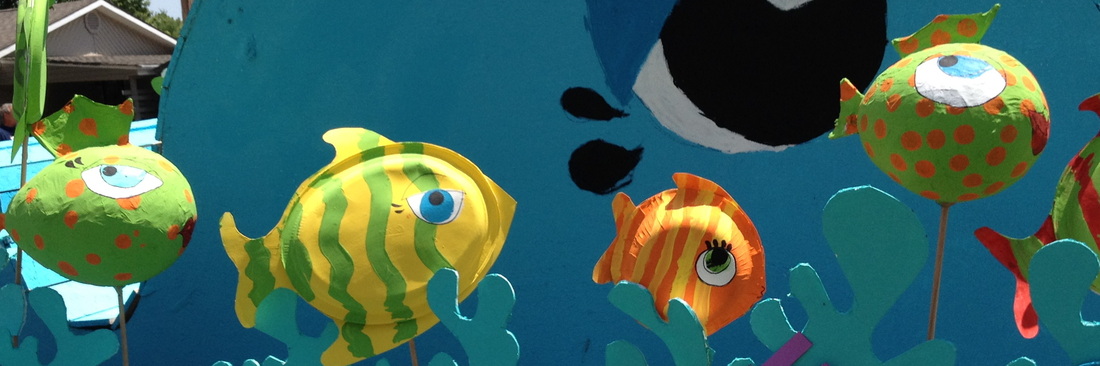
Another idea I borrowed was from Helen Friel's paper work of an underwater scene that displays jewelry. I took her small version and went up in scale by a lot.
Picture
Helen Friel's paper work via Design Sponge
You can see that ours doesn't look like Helens but that you can see the similarity of the borrow. I used foam core (instead of plywood) so that we could have many young people involved in the cutting and painting.
Photo parade float shannon christensen

#3 Fish for the Love

You're going to be with this idea awhile. Make sure you love it so that you can hang in there with it. Nothing says failure like hating an idea. 

#4 Fish for Solutions

Things just aren't going to go 100% your way. Have that in your head at the start so when it comes up you already knew it would. Listen to others ideas during the process.

#5 Fish till the End

Don't give up. Sometimes things don't look like they're going to work out, only to be proved wrong. Stick with it. Creativity is often messy in the middle. 

#6 Fish for Harmony

With a big group, you're likely to have a wide range of interest and skill levels. To make it look good and like everyone worked together keep a 1) limited color palette, 2) repetitive shapes, and 3) easy to accomplish tasks.

#7 Fish for the Wow!

Wow them in some way. Surprise them with something a little different. Make it stand out - in a good way. For this float I had the whale shoot water out of its spout. The crowd loved it especially since it was hot. I left an opening in the top of the whale and had one of my kids sit inside with buckets of water and a pool water shooter. You can see him trying it out on a passing friend. During the parade he was hidden from view. The water shot up about 15 feet in the air. It worked perfectly.
Photo parade float with shoot water • shannon christensen
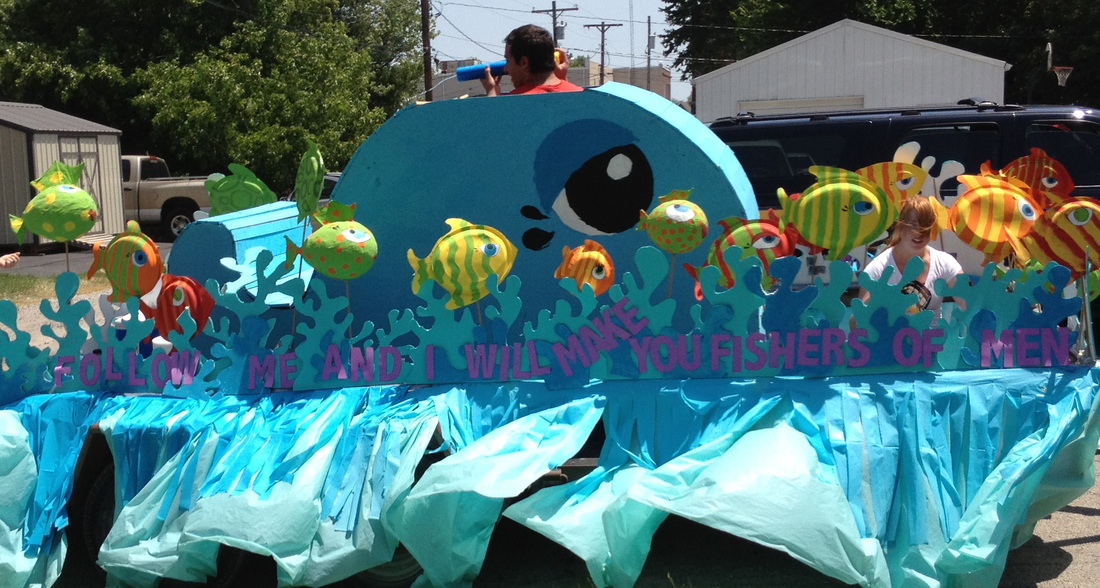
Hope these tips help you in your parade float madness. I don't know if I'll be asked to do a float next year but if I do I'll read through my own notes as a reminder but until then we'll say good-bye to float building.
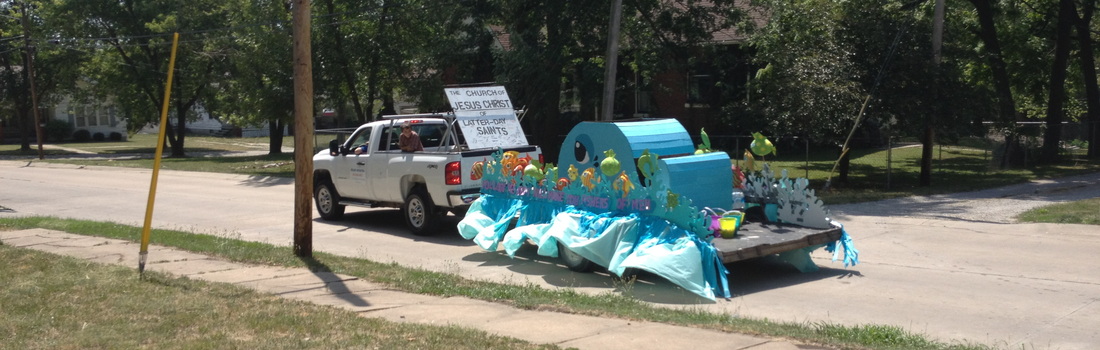
Photo parade float shannon christensen
Subscribe
9 Comments
Meri Beth young
9/24/2013 08:49:41 am

What is the water made of and how did you do it? Thank you

Reply
Shannon link
9/24/2013 10:40:11 am

Hi Meri Beth,

I used foam core board available at any craft store. Cut it out with exacto knives and scissors and painted it with acrylic paints. The youth did it. Hope that helps.

Reply
wendy
7/5/2015 02:06:39 pm

How did you make the whale? What is it made of?

Reply
Shannon link
7/6/2015 09:34:53 am

Hi Wendy,
It sounds like you might have a project coming up.

The whale is made out of plywood. Each side is made from one 4' x 8' piece of (1/2" or 3/4") plywood. So, 2 pieces of 4'x 8' plywood are needed for the sides. The sides of the whale are joined together by 2" x 4"s. There were about 4-6 on the front section and 6-8 on the back section. You can make them as wide as you want. Ours were probably about 3' - 4' across. These boards are what give it stability and hold it together.

Then we cut another piece of plywood that was thinner (1/4" - 1/2" I can't remember) and made slats to nail over the top of the 2" x 4"s. This is just for looks. It was nailed to the edges of the whale sides.

We also left an opening in the top of the whale for a person to get in and out of. We had that person shoot water out of the top of the whale like a whale's spout.

The whale was used in someone's yard for their kids after we were done.

Hope you have fun with your project.

Reply
Wendy
7/6/2015 11:49:10 am

Thank you! Our church is looking to build its presence in parades and we LOVED this one! Going to attempt it next year for 4th of July VBS float. TBD, wish us luck!

teresa gagne
5/22/2023 07:30:55 pm

Wondering what you made the whale out of and how did you attatch it?

Reply
Bernard C link
12/19/2020 11:50:26 pm

Thanks foor a great read

Reply
brenda
9/6/2022 06:39:12 pm

How did you attach the fish to the float

Reply
Drew Norris link
7/1/2024 06:45:06 am

Nice blog thankss for posting

Reply


Leave a Reply.

    Shannon's Studio

    Archives

    March 2023
    July 2022
    June 2022
    October 2021
    February 2021
    January 2021
    October 2020
    September 2020
    April 2020
    March 2020
    January 2020
    December 2019
    November 2019
    October 2019
    August 2019
    July 2019
    February 2019
    January 2019
    December 2018
    September 2018
    August 2018
    July 2018
    June 2018
    May 2018
    April 2018
    February 2018
    January 2018
    December 2017
    November 2017
    October 2017
    September 2017
    August 2017
    July 2017
    June 2017
    May 2017
    April 2017
    March 2017
    February 2017
    January 2017
    December 2016
    November 2016
    October 2016
    September 2016
    August 2016
    July 2016
    June 2016
    May 2016
    April 2016
    March 2016
    February 2016
    January 2016
    December 2015
    November 2015
    October 2015
    September 2015
    August 2015
    October 2014
    September 2014
    July 2014
    June 2014
    March 2014
    September 2013
    September 2012
    August 2012
    July 2012
    June 2012
    February 2012
    January 2012
    October 2011
    September 2011
    July 2011
    June 2011
    May 2011
    April 2011
    March 2011
    February 2011
    January 2011
    December 2010
    October 2010
    September 2010
    August 2010
    July 2010
    June 2010
    May 2010

Shop • 1 Creative Lifestyle & Space
Shop • 2 Creative Learning & Skills
Shop • 3 
Creative Living & Habits
Shop • 4 
Creative Loving It & Identity
Shop • 5 
Creative Leading & Business
Shop Backpacks & Bags
Shop Etsy Shannon's Studio 
2005 - 2025 © Shannon Christensen • [email protected]
  • Home
    • Welcome
  • Roadmap Stops
    • 1 LIFESTYLE Landmark >
      • My Fabric Collections
    • 2 LEARNING Landmark
    • 3 LIVING Landmark >
      • 8CPH Courses
      • JUMPSTART 8 CPH
      • #1 CPH IDEABOOK
      • #2 CPH THINK TANK
      • #3 CPH SKETCHBOOK
      • #5 CPH X•X•O
      • #6 CPH SUPERPOWERS
      • #7 CPH VISION
      • #8 CPH SHOW & SHARE
    • 4 LOVING IT Landmark >
      • Illustrated Lifebook
    • 5 LEADING Landmark >
      • Build Your Body of Work • Shortcut to Your Signature Style
  • PASSPORT
  • Shop
    • Shop • 1 Lifestyle & Space
    • Shop • 2 Learning & Skills
    • Shop • 3 Living & Habits
    • Shop • 4 Loving It & Identity
    • Shop • 5 Leading & Business
  • MORE
    • Portfolio
    • Blog - Creative Roadtrip
    • Benefits of Creativity
    • Thank you for your Purchase