|
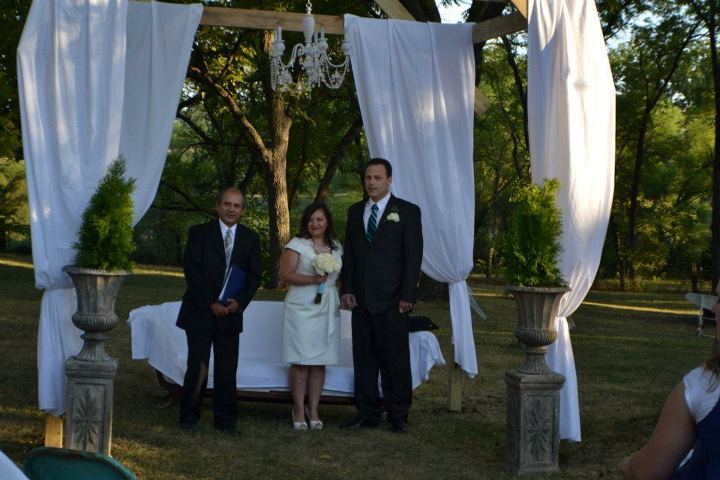
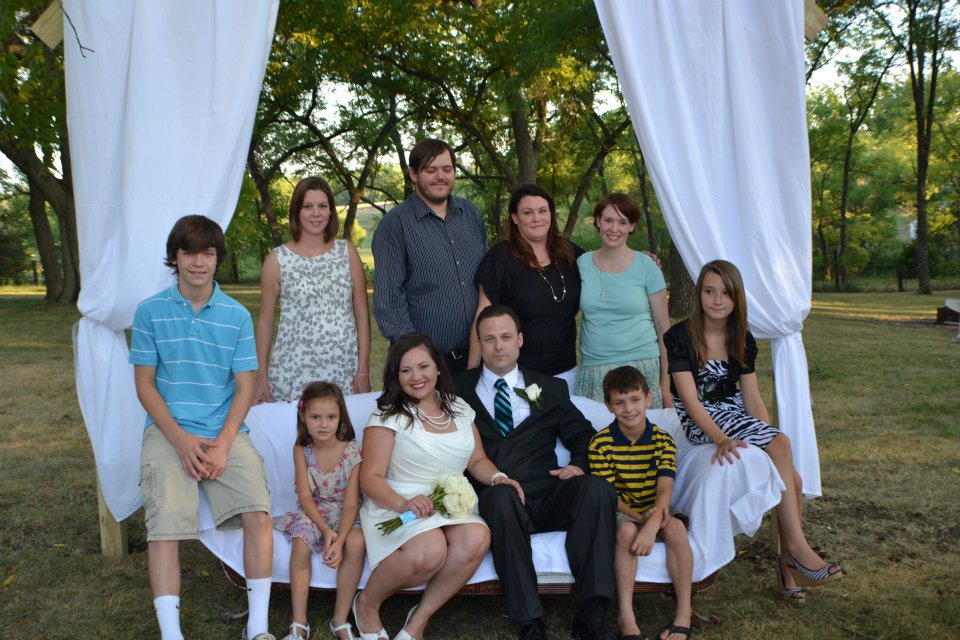
Sometimes I wonder about my children. And I'm talking about the adult ones. Last year 3 of them got married, all in a month and a half. See what I mean. Two of the weddings were ours to put on. It was crazy. Some of it's here. Well, I thought last year was as stressed out as it was ever going to get for us as far as weddings are concerned. Silly me. We were on a family trip 2 weeks ago when my eldest called and said she was getting married - in less than a week. What the crazy? And it was going to be at our house. We wouldn't be home for several more days. Needless to say we cut it short, got home Sunday night and had the wedding Wednesday. And I have to say we didn't do half bad. Or even three quarters bad. Okay, it really turned out all good. So, that's how we celebrate around here - intensely. We're so happy for our newest member of the family, Sky. More of their story is here. 
All the fam was here except for Barry, though we got to see him through video chats. 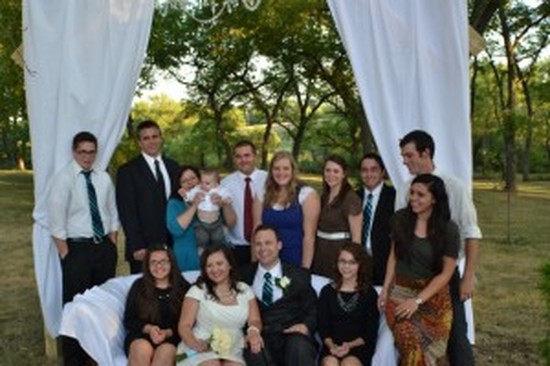
I'll try to post some of what we did and how we put it all together so fast later.
6 Comments
I'm sorry I'm posting something a little late here, but it was on time there. There, being the Idaho Women's Journal where I will post a few articles in their family life section. The Article is Fortune Cookies & Freedom. It's late because Friday was National Fortune Cookie Day but not so late that you can't use it on other days. (You'll have to head on over to get the idea and download.) It's just a way for you to tell someone it's your good fortune to know them.  Download the Fortune Cookie Box Pattern by clicking image above The other day one of my daughters informed me that she had a birthday party to go to. Of course she let me know at the last minute and we were scrambling for a gift. I went back to my original idea of the Hospital Contraband Kit and decided to see what I could do to quickly revise it. With a few changes this is what I came up with. 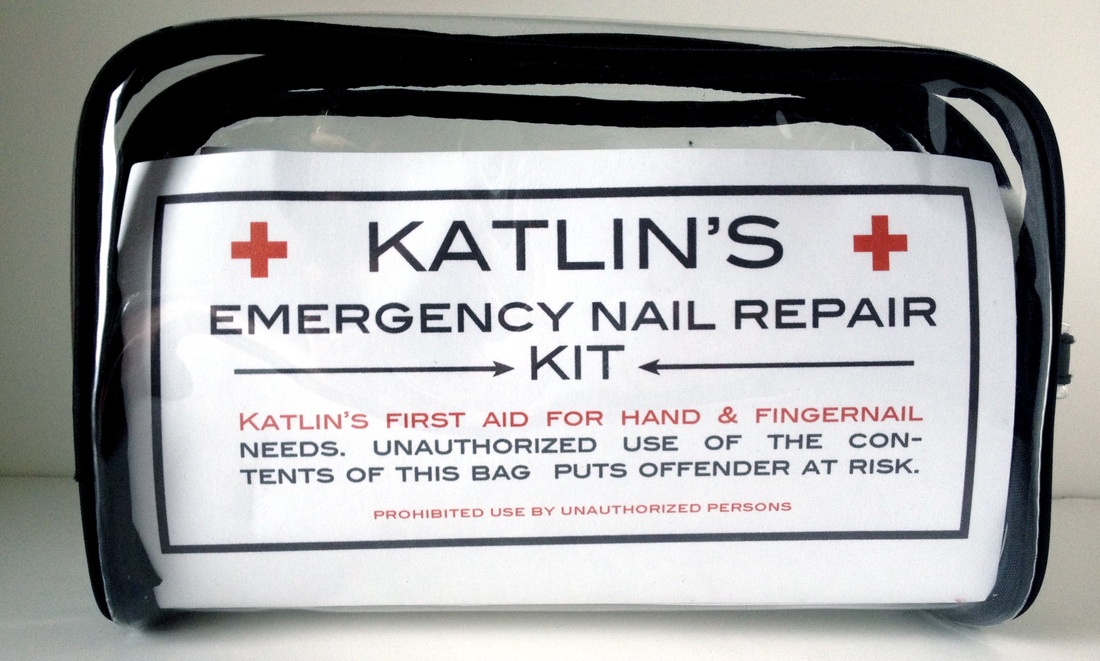 I printed the new insert and she folded and filled it. What a life saver!! I'm beginning to really like these kits. Made my life a little easier when my kid was trying to make it harder. Here are the contents she put inside. 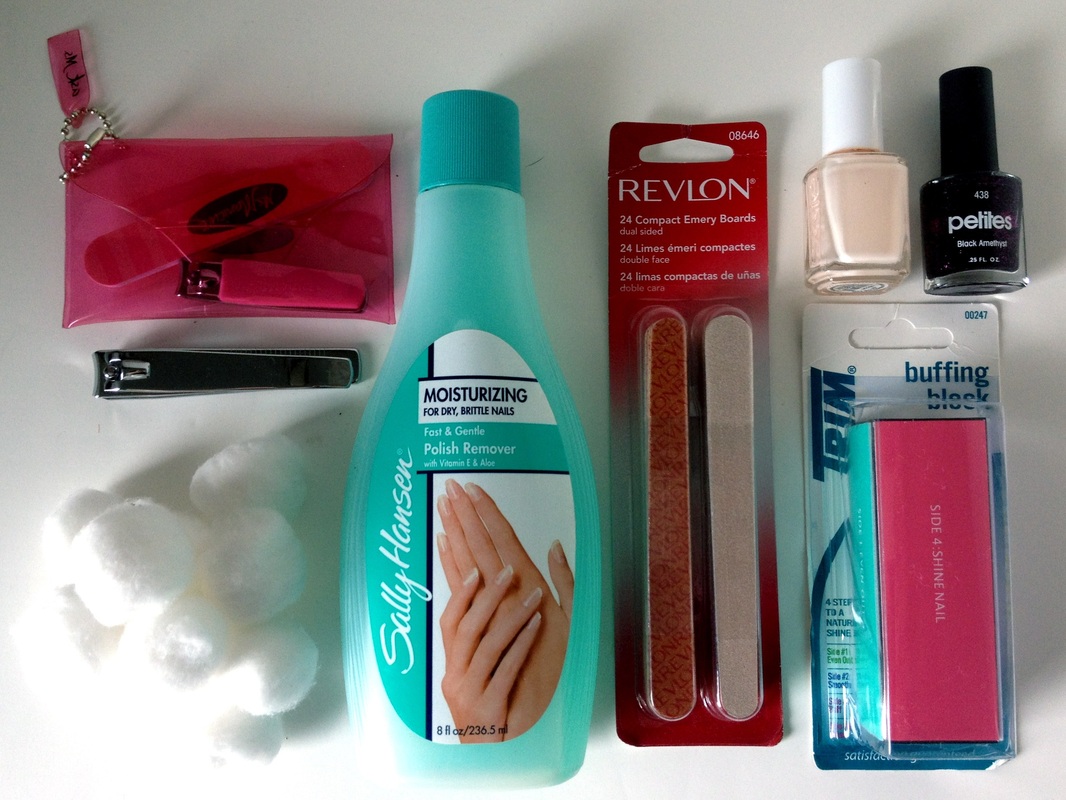 Here's a download with the name space left blank. I've added a few direction with the measurements so that you can print it off with your own name if you want. Hope the idea comes in as handy for you as it has me.  Download the template and instructions 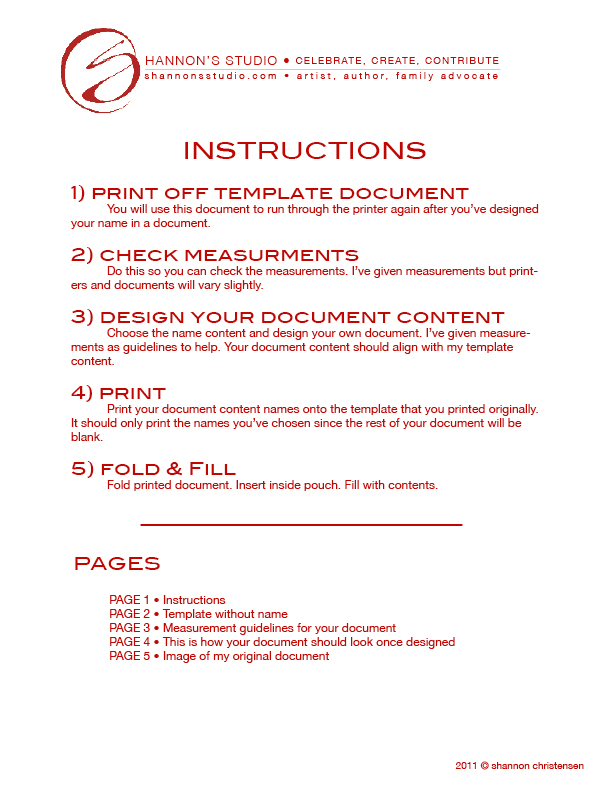 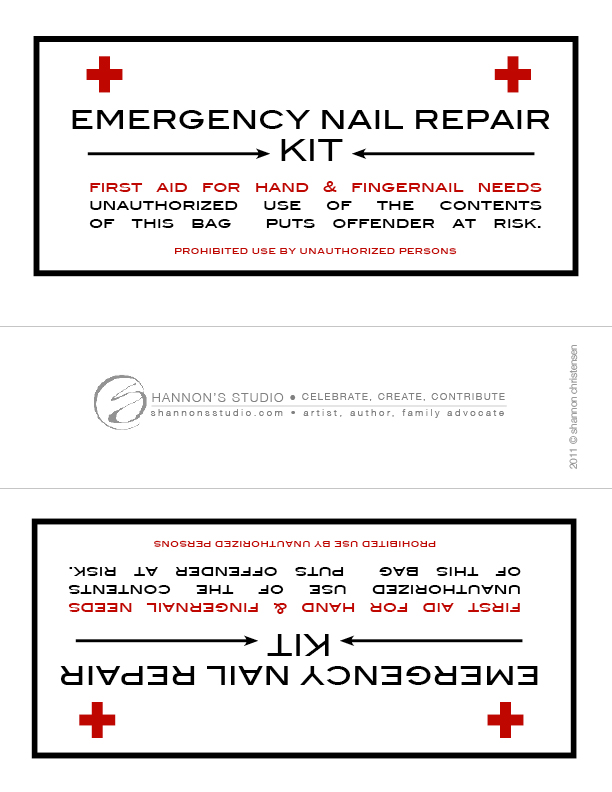   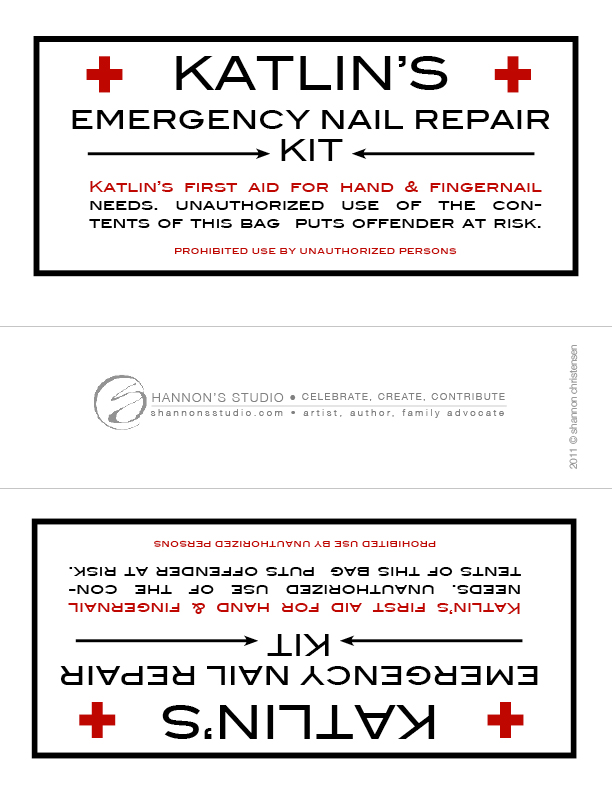
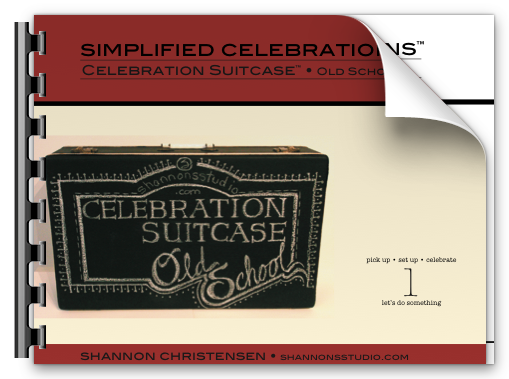 Celebration Suitcase • Old School • eBook @ ShannonsStudio.com I have finally finished (see my New Year's Resolution) one of my Celebration Suitcase projects. It's a suitcase that holds decorations for a party - anytime, anywhere, for any reason. This one is themed "Old School" and I show 3 ways it can be set up. I've created an ebook that shows what's inside and how to use it. It's for sale for $3 here. (I have to support my habit somehow.) 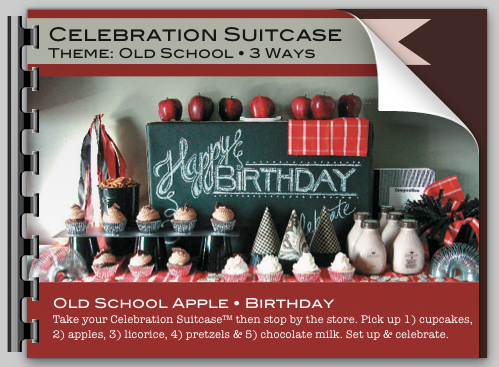 One way to set up Old School Celebration Suitcase • Apple Birthday @ ShannonsStudio.com I also show some DIY info so you can see how I did it and then do your own. I was so excited with this idea of stage lights on the inside of the lid. Plug it in and they light up. (I have more creative ideas in the works too.)  DIY Old School Celebration Suitcase • How to info @ ShannonsStudio.com My kids thought it was fun when we used it one night for Family Night. Love to celebrate!!! 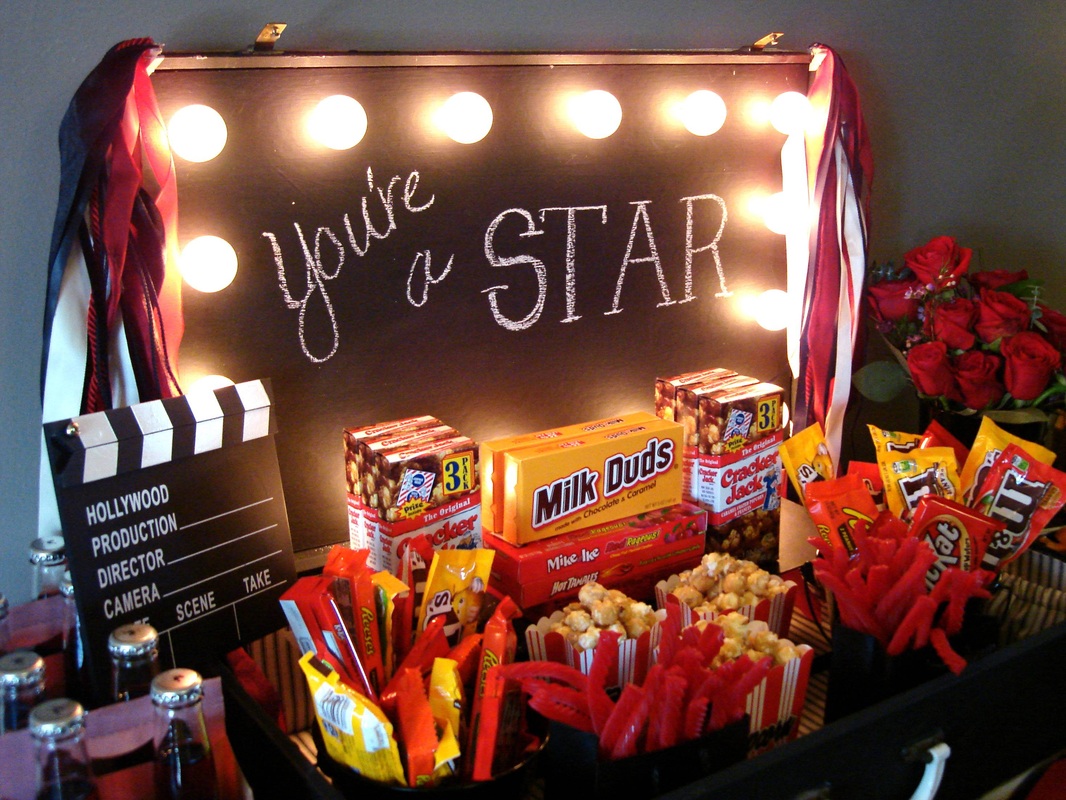 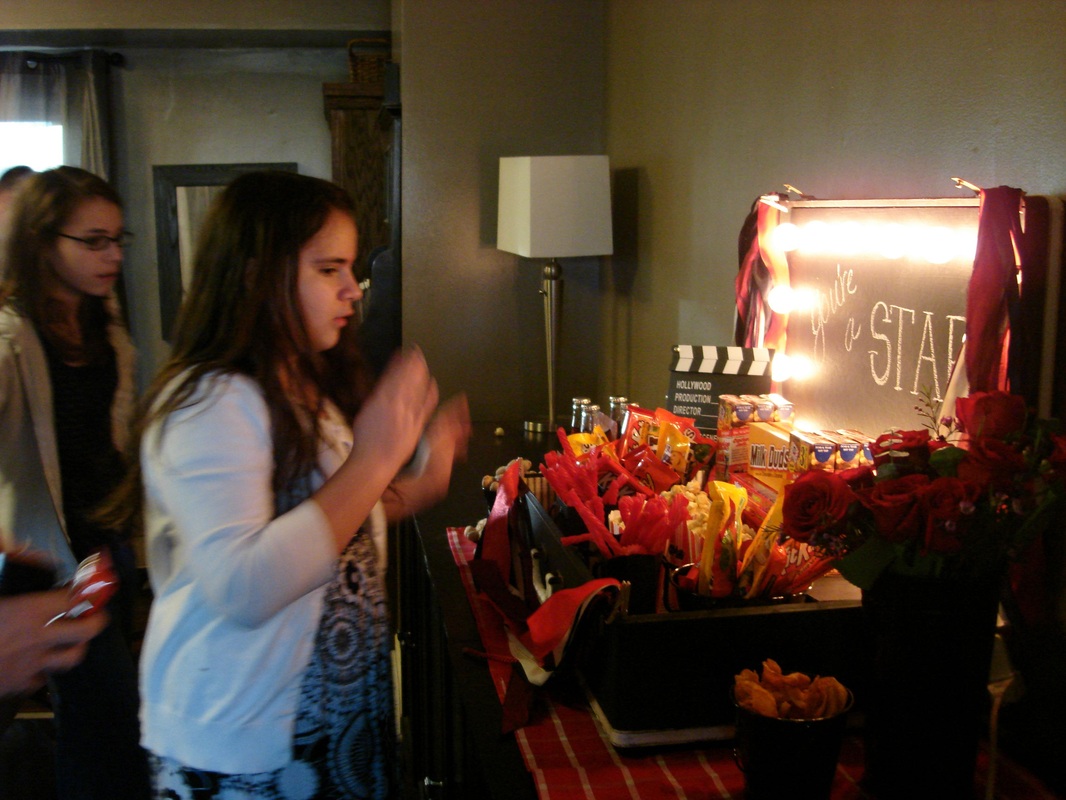 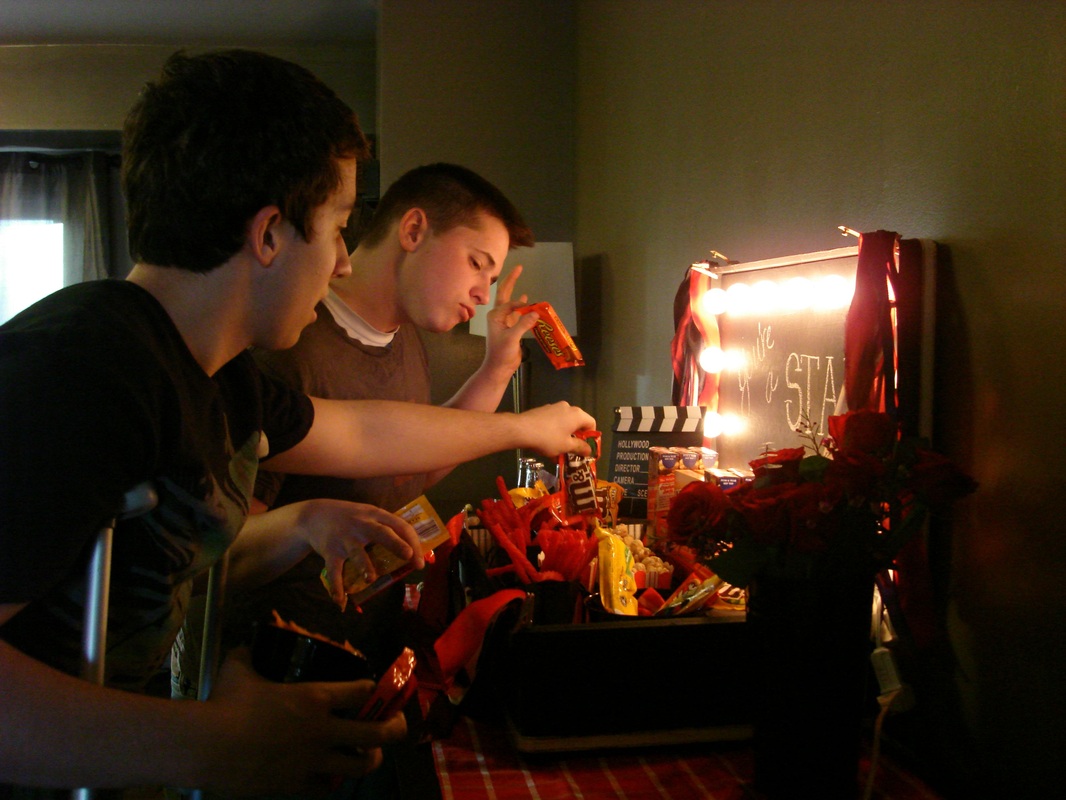 How would you use the Celebration Suitcase?
The Boyfriend and my 29th anniversary was a month or so ago. This invitation from Mod Memento, was the inspiration for my gift to him.  Image from Brianna @ Mod Memento I decided to write our relationship in this storybook pattern. It's written third person and actually was quite easy to write. We have 29 years, with a lot of history, so it turned into 2 boards. I loved doing it. Here is a copy of it.
I also wanted to try this transfer method so I put the two together. It was a lot of work and wouldn't suggest it for a first timer. But, I do love the result. And he did too. Here it is hung in our home.  The image is terribly shot but that's the only one I have right now. Sorry about that. Here is a slide show with a few instructions. The play button is in the top left hand corner. 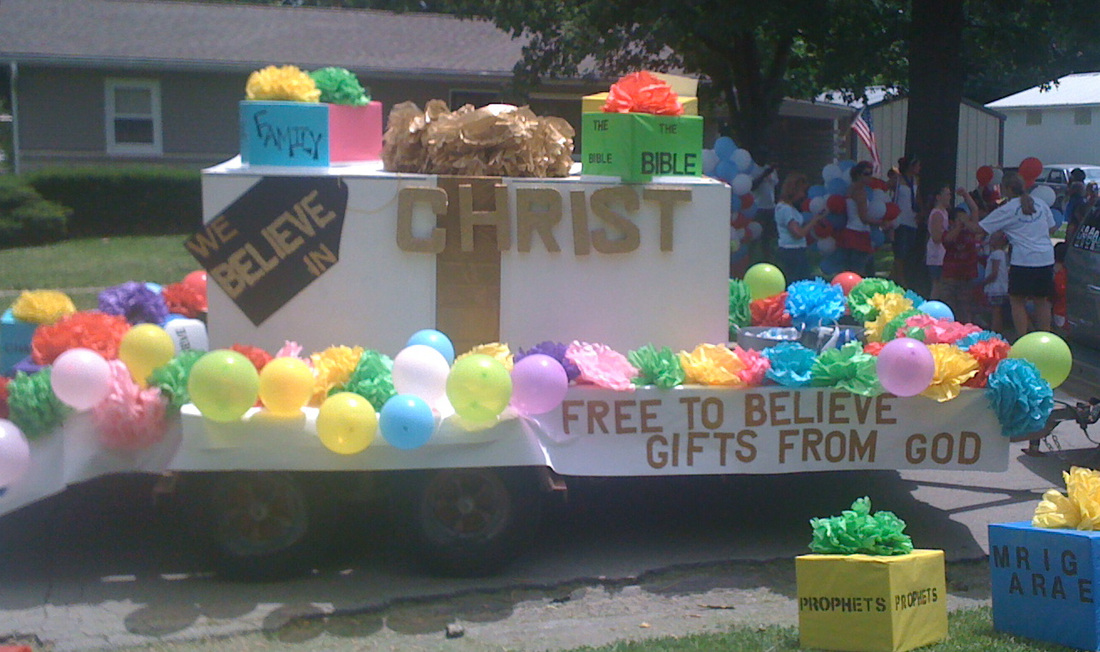 Parade Float • Cameron July 4th Parade • 2011 Parade Float conception and construction is not usually what people do in their spare time. Welcome to the unusual life. Here's a float our youth group did for the parade this summer. We had about a month to do it from start to finish. I think the longest part was trying to come up with something that 1) had a message, 2) that many people could be involved with and work on, and 3) that stay within a very small budget. It took us about 10 - 12 hours of group construction. And a few more from me. Our Construction Team did a great job! The young women are a natural at this sort of thing but the young men even got their creative sides to show up and did a lot of things they don't normally do. And everyone was laughing, smiling, and having fun with one another. Bonus! I've kept my mad-float-building skills to myself and didn't volunteer for this project. Things just seem to find me. Like the float another group I was a part of did 12 years ago. It was a bit bigger with more people involved. But, I learned a lot constructing... guts for all the animals - saws, screw guns, wood, chicken wire, pulleys and paper mache on a LARGE scale. Also, there was animation - giraffe's swiveled, jaws opened up, and elephants sprayed water on the crowd. It was a great learning experience for me. Things tend to run in my family and here's my sister's float experience. 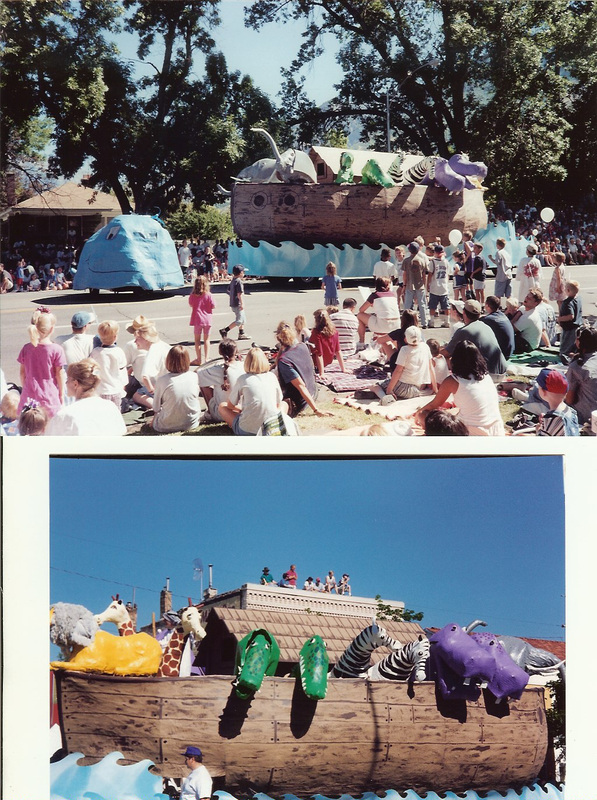 Parade Float • Provo Freedom Festival • July 1999 • Grand Marshall Award I noticed that a lot of sites that talk about DIY float building have never built a float. I hate that. Not because they haven't built one (they could have done a lot of good research talking to people who have made one) but because their info doesn't really answer the questions of people who are doing it themselves and usually aren't "creative". So, here are a 5 quick tips to things that usually come up in the beginning of any parade float madness. Here's 5 Quick Tips to DIY Parade Float Building1) Have a ThemeThis helps immensely in decision making. If you know what you want to put across, that helps in the how to put it across. Having a theme will automatically make some decisions for you. 2) Know your BudgetDIY floats can be from a few hundred dollars (the Free to Believe float) to a couple of thousand dollars (the Ark and Sister's float). Knowing how much you can or can't spend helps you get creative with materials. 3) Appoint a HeadSomeone's got to be the bottom line. There has to be a coordinated effort for the group. When things don't go according to plan, and that will happen, then someone has to be able to make a decision about what to do next. 4) Combine a TeamEven though this is a DIY project, it's still a good idea to have teams doing specific tasks to spread the workload. Get a 1) Trailer Team, 2) Creative Design Team, 3) Construction Team, and 4) Outreach Team. Because this isn't a project that comes along very often, involve as many people as possible. 5) Enjoy the ExperienceIt's hard when you haven't done something before and don't know how it's going to turn out or even if it's going to turn out, but try to remember to have fun along the way. By nature, parade floats are about fun and celebration. It should be that way through the whole process. Here are a few links of DIY types. They don't really have a tons of info but it might get the ball rolling for you. • Here's a DIY for the "guts" (trailer construction) of a float • This link describes the standard materials (tends to be expensive) and lots of other parade float info. • Another true DIY parade float builder with tools they used • UPDATE 2/25/12 Another link with a few tips by Bethenny Watters, eHow Contributer Add more links below from others. I've already been given the assignment for next year.
Here's a celebration idea for a DIY wedding that we used. Actually, it would be fun at any number of occasions. It's a 6 foot chalkboard that we used at wedding #2 and repurposed for wedding #3. The Groom made a frame for it and we stood it on end at the entrance of the reception. I had one of the gals write on it "Jessie & Barry go together like...". It went along with part of the reception theme of cookies and milk. We had the reception at a dairy farm that the bride worked at. 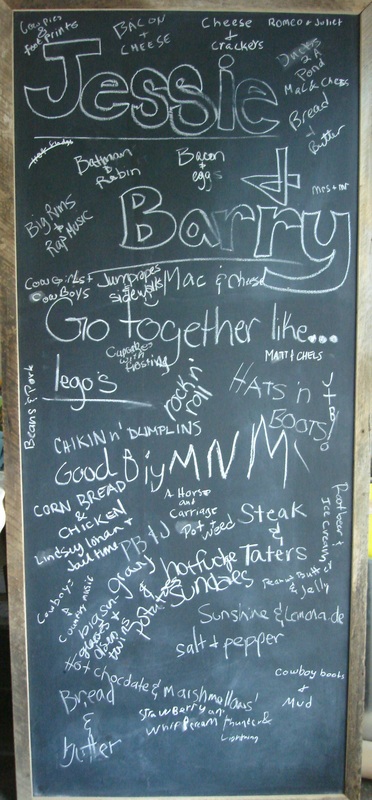 Guests were able to write their combinations. Some of them were - bread & butter, salt & pepper, cowboy boots & mud, cornbread & chicken, mac & cheese, bacon & eggs, batman & robin, chicken & dumplings, hats & boots.
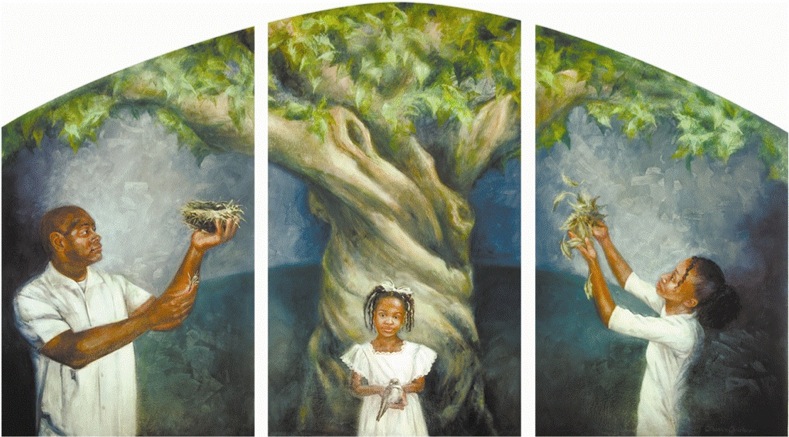
I am CELEBRATING! The three DIY weddings are over! I'm thrilled for the marriages of my kids, but glad I'm at this end of the work. Here are the 3 DIY Wedding dresses. Luckily, I didn't have to sew all three. I sewed 2, which wasn't so bad, except, they were customized patterns, and you know, for the timing of 2 months to do both. Thank goodness they were simple. (Well, that was after I vetoed trying to make a Vera Wang number for wedding #2.) Here's wedding #3 dress and couple.  Wedding #3 • Chiffon & Gathers 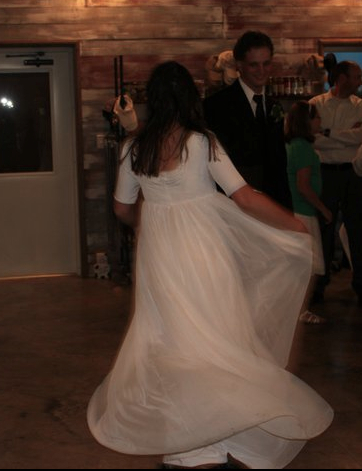 Her favorite part - the Chiffon Twirl 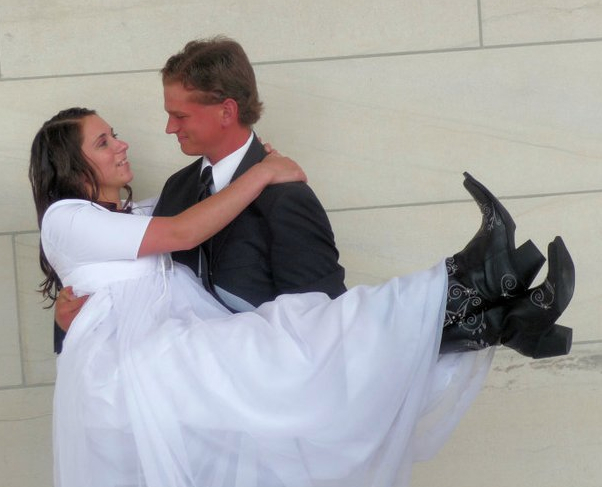 Or... it could've been the boots Here's wedding #2 dress and couple. My two girls look different and have totally different styles. 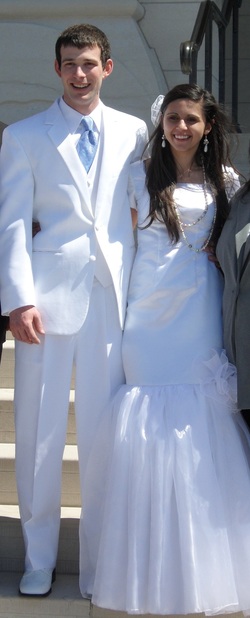 Wedding #2 • Satin & Shimmer  Her favorite part - 4 inch heels Here's wedding #1 dress (compliments of her Grandmother) and couple. That's my son, so pleased. 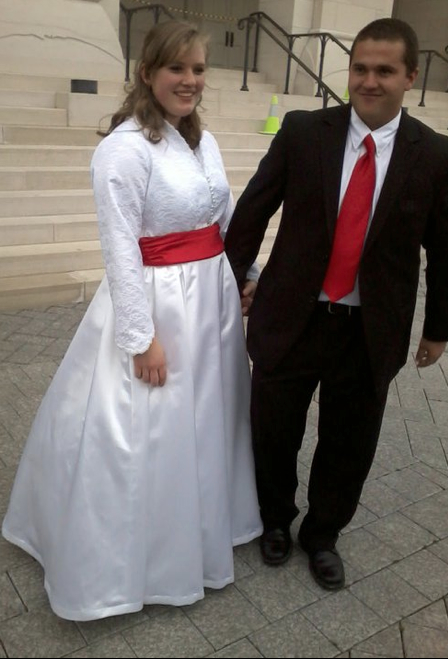 Wedding #1 • Lace & Buttons 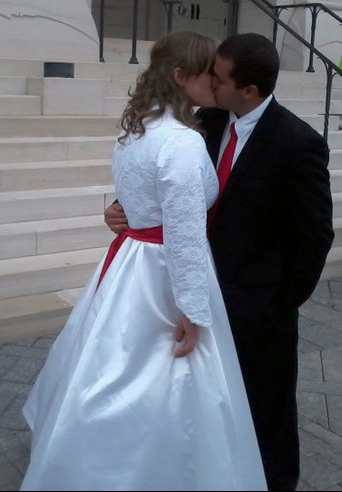 Her favorite part - the red, or maybe it's the kiss When we decided on the birdhouse theme for this DIY wedding I did an image search of birdhouses. I didn't know there were so many different styles and that the really nice ones were so dang expensive. And I rarely find exactly what I am looking for anyway. So, plan B, we build them ourselves. I call this one the Birdhouse Triptych. Dictionary.com defines a triptych as "a set of three panels or compartments side by side, bearing pictures, carvings, or the like". I consider these birdhouses, "the like". Usually, paintings are done this way, like this one but this time, I just applied it to wood. 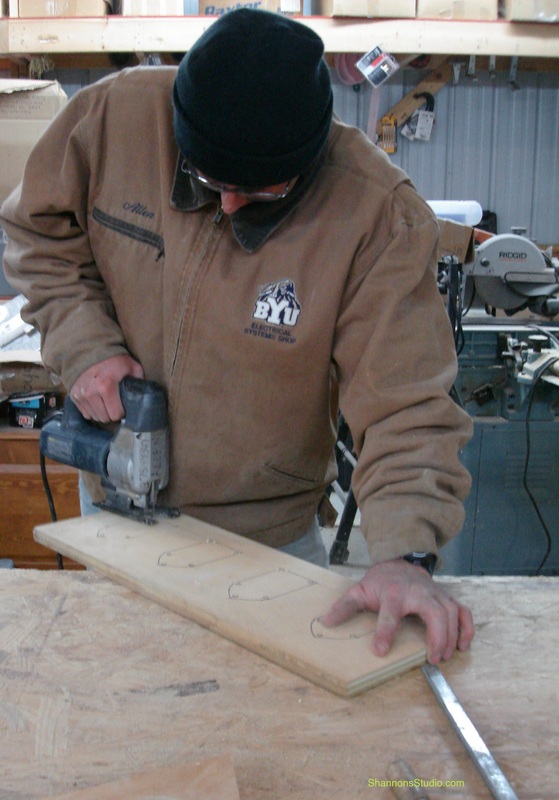 I measured, drew, and cut some out. But admittedly, the Boyfriend is bigger, stronger and faster (and better looking) than I am. Everything takes me three times longer. So, he did most of the assembly. 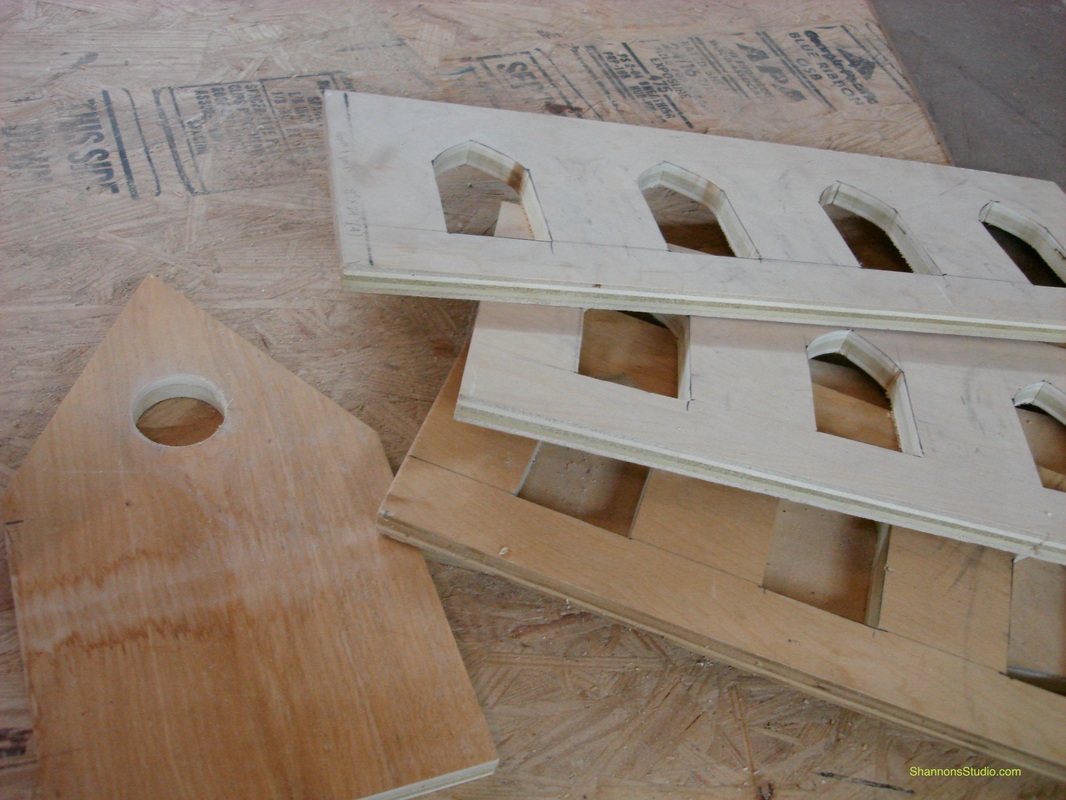 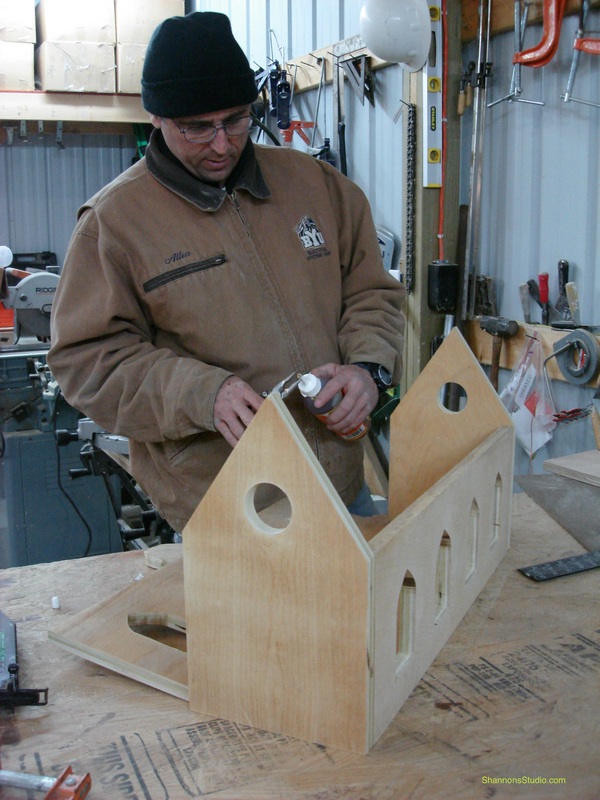 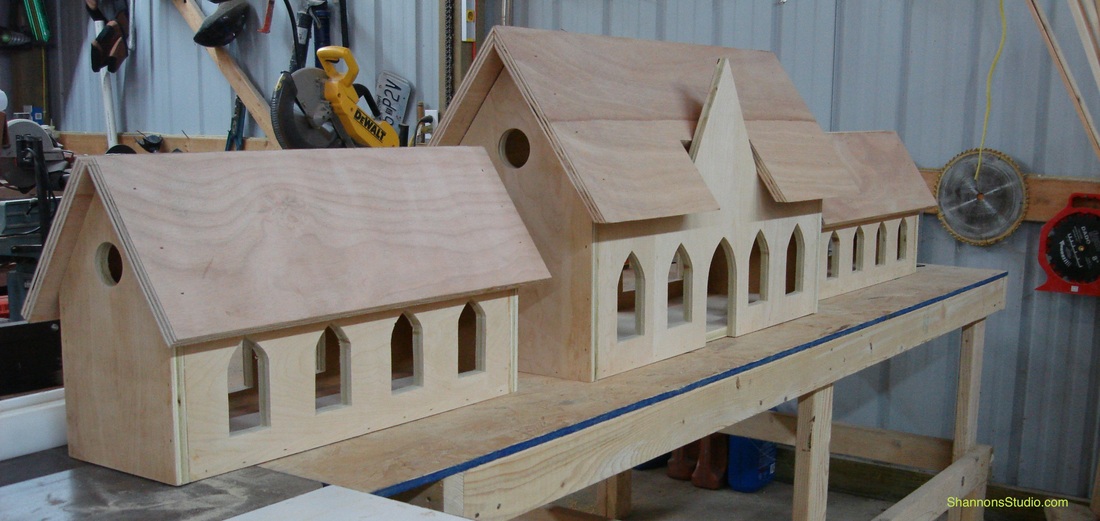 We make a very good team. Except when we don't. Luckily, this wasn't one of those times. 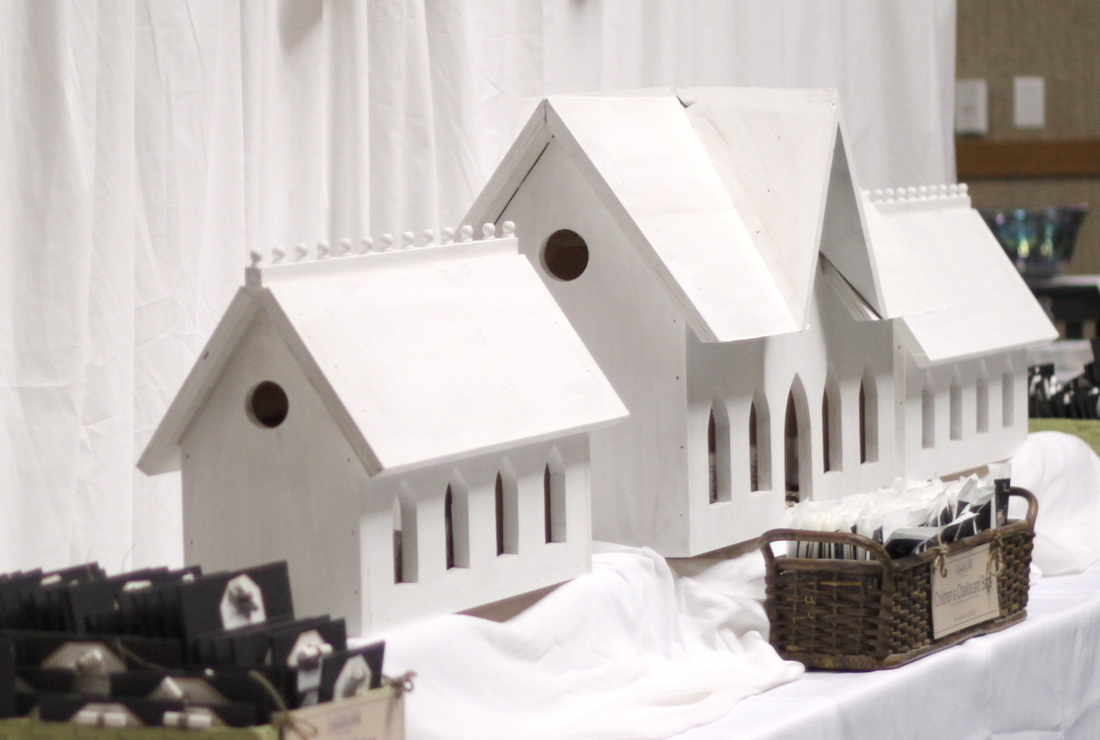 Hope you feel inspired for your next celebration.
This is one of the things I miss most about our house in Utah - the Zephirine Drouhin roses. There were several arches full of roses that smelled delicious. I loved going out and seeing those beauties and smelling that fragrance. It was so delightful. We've lived here for 3 1/2 years and I have planted zero roses. And after reading this post I know why it makes me sad every season when I realize that I haven't gotten around to doing it. 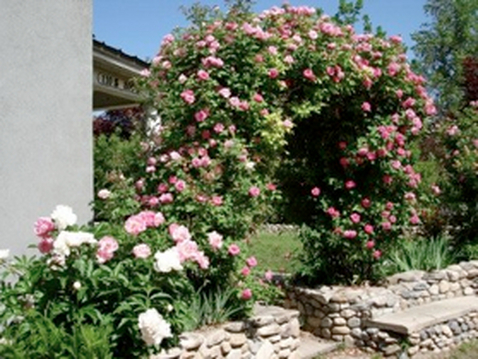 The peonies we planted next to the waterfall I built (which you can't see) and the stone walls and bench we built. It was a step down garden and we called it the "Pit O' Luv". 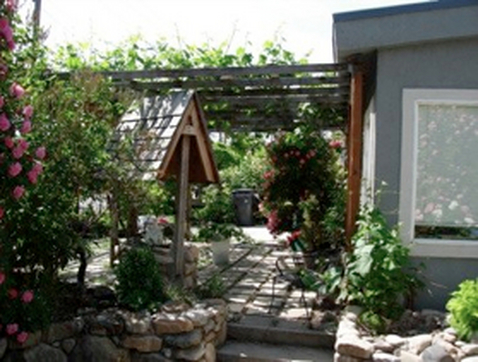 The wishing well my son (I think he was 12) and I built. My kids hand prints are in the bottom of it. I was very proud of that roof, thank you very much. There was also a fire pit below, next to the stairs (left), waterfall (right.) We laid the pavers and built the grape arbor too. 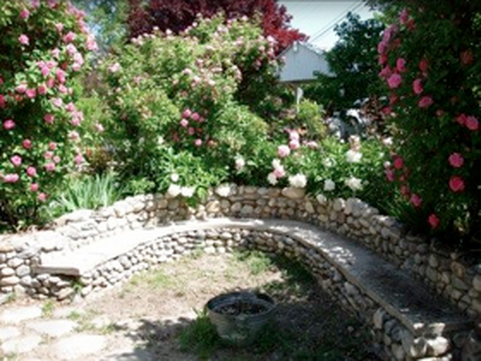 This was some of our beginning rock wall building. It's kinda scrappy. We got much better as we went. You can see why I miss it. Well, the Boyfriend came through for me on Mother's day (with the help of the Lawyer.) He's out of the country but he had her get me my first Missouri roses. She got Don Juan's in his honor. I am a little giddy over it. I can hardly wait until they are as big as the roses we left. The boys doing the dirty work. 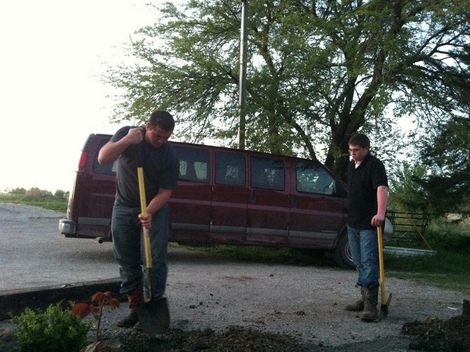 Happy Mother's Day to me. And I hope your's was as well. |
Archives
August 2012
Categories
All
|
||||||||||||


 RSS Feed